Key Takeaways
Beginner-friendly (with the right setup)
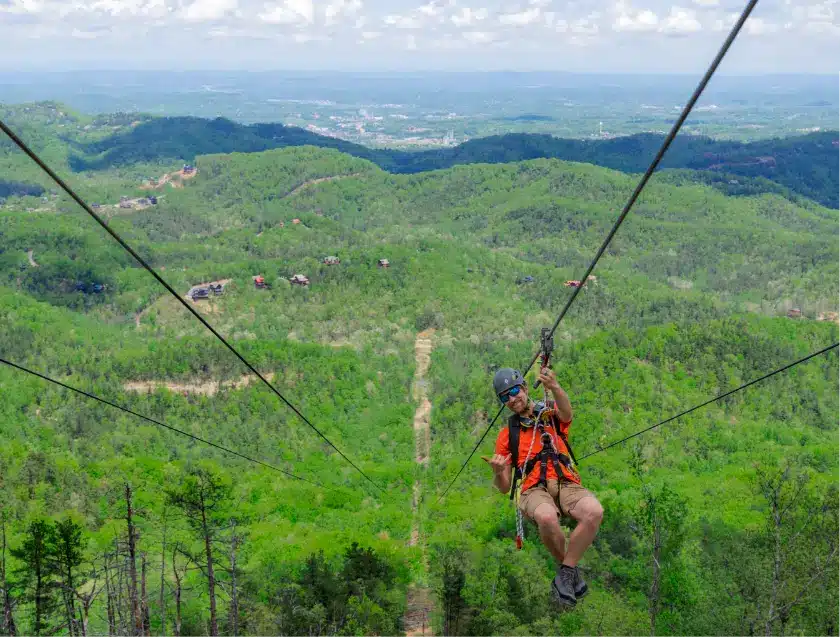
Ziplining is usually beginner-friendly when tours use trained guides, clear briefings, inspected equipment, and properly fitted safety gear.
Plan for more than “ride time”
Your “ride time” is only part of the experience. Plan for check-in, waivers, harness and helmet fitting, safety training, and moving between platforms. Arriving early keeps everything calm.
Clothing matters more than you think
Clothing choices make a bigger difference than most first-timers expect—wear snug, harness-friendly layers and closed-toe shoes, and avoid dangling items.
What to do on the line
On the line, sit back in the harness, keep your body centered, use the hand placement your guides teach, never grab the cable, and treat landing as a listen-and-lift sequence.
Secure your phone + eyewear
If you bring a phone or eyewear, secure them so your hands stay free for clipping in and following the guide’s instructions.
Most people’s first time ziplining is equal parts nerves and excitement, and that’s exactly why it’s so much fun. With the right prep, you’ll feel more comfortable in the harness, more confident on the platform, and more present for the views.
As you prepare for your first ziplining adventure, find out more about how to zipline and get the most out of your experience.
Is Ziplining Safe for Beginners?
Yes, ziplining is usually safe for beginners, especially when the zipline has trained guides, clear step-by-step instructions, regular inspections, and safety gear.
Before you zipline, you’ll be fitted with safety gear, you’ll get a briefing on technique and course rules, and your guides will coach you through what to do at launch, mid-ride, and landing. Your job is simple: listen closely, ask questions when something feels unclear, and follow the instructions exactly.
What to Expect Ziplining
Most first-time ziplining experiences follow similar steps.
You check in and sign a waiver, you get fitted with a harness and helmet, and you listen to a safety briefing that covers body position, hand placement, and landing technique. Some tours include a short practice zip before the main lines, which can be a big confidence boost.
Plan for a mix of active moments and waiting for your turn. Even if the ride itself is quick, your total experience usually includes gearing up, moving between launch points, and getting everyone through safely.
11 Tips for First-Time Zipliners
If you want to feel more confident before you zipline, check out our top 11 ziplining tips for beginners below:
1. Check Limits and Requirements Before Arriving
Before you do anything else, pull up your booking confirmation and the park’s requirements. Most locations set age, height, and weight ranges so the harness fits correctly and the braking system works the way it’s designed. Footwear rules are also common, and closed-toe shoes are usually non-negotiable.
If you’re close to a posted weight limit, weigh yourself the same way you’ll ride, meaning with the clothes and shoes you’re actually wearing. If you’re booking a group, make sure everyone meets requirements before you get in the car. This one step can save a lot of awkwardness at check-in and keep your day from turning into a last-minute scramble.
Want to know more about height and weight requirements for ziplines? Have other questions? Read our Ziplining FAQ Guide here.
2. Wear Zipline-Appropriate Clothing and Avoid Loose-Fitting and Dangling Clothing/Accessories
Think “comfortable and secure,” not “cute and floaty.” Harnesses sit at your waist and upper thighs, so smooth, fitted layers tend to feel best. Athletic shorts or lightweight pants work well, and longer inseams usually mean less strap rub.
Skip anything that can snag, shift, or fall. That includes loose hood strings, scarves, big earrings, and anything dangling that could distract you mid-ride. Closed-toe shoes with laces or a secure fit help you feel steady on platforms and trails, and they keep your shoes from slipping off when you’re in the air.

3. Adjust Your Clothing for the Weather and Wear Sunscreen
Weather affects comfort more than fear does, especially because you’ll spend time standing around between turns. Check the forecast for temperature, wind, and rain, then dress in layers you can move in. A light rain jacket can be a lifesaver during passing showers, and breathable fabrics help if your tour is warm or humid.
Apply sunscreen before you gear up so you can cover your shoulders, neck, and any exposed skin without fighting your harness straps. If your tour is in a wooded area, bug spray can be a smart add-on. You don’t want your first zipline memory to be a sunburn and mosquito bites.
4. Arrive Early and Budget Enough Time
Ziplining isn’t just the ride. Your total time usually includes check-in, a waiver, gear fitting, a safety briefing, and moving between launch points. Arriving early gives you breathing room for all of that, and it keeps you from starting the day stressed and flustered.
Use that extra time to set yourself up for comfort. Hydrate, eat something light so you’re not running on empty, and hit the bathroom before you gear up. Once the harness is on and the tour is moving, it’s harder to squeeze in quick breaks.
5. Pick the Right Course
Not all zipline experiences feel the same, and that’s good news because you can choose one that matches your vibe. Canopy tours usually have multiple shorter lines and more time to ease into the feeling. A signature “big zip” style ride is often faster and higher, with fewer reps before the main moment.
If you’re nervous, look for an experience that includes a clear ground school, guides who stay with your group, and a warm-up element if offered. If you’re excited and want maximum thrills, choose a ride that highlights speed, length, and views. Either way, it helps to ask how braking works since systems can vary by course.
6. Listen to the Guides and Take the Safety Briefing Seriously
Even if you’ve watched videos, your guides are teaching you the rules for that specific course. Pay attention to the commands, the hand signals, and the exact body position they want you to use. These safety briefings are also where you’ll learn what to do if you don’t reach a platform, how to pull yourself in, and when you should and shouldn’t move.
Make the briefing interactive for yourself. Do a quick mental run-through of the steps, and ask a question if you’re unsure about hand placement, landing, or braking. Most first-time jitters disappear when you know exactly what’s coming next.
7. Wear Safety Gear and Tie Up Your Hair
A good harness fit should feel snug and secure, not pinchy. Help your guides help you by clearing your pockets before fitting and telling them if anything feels twisted or uneven. Small adjustments at the start can turn an “okay” ride into a comfortable one.
You’ll also want to tie long hair back so it stays clear of straps and hardware. Remove or secure anything dangling, like long earrings and necklaces. If you wear glasses or sunglasses, ask what the park recommends. Many riders use a strap to keep their eyewear secure during the ride.
8. Secure Any Loose Items
Plan for your hands to be busy, even if the ride feels hands-free in your head. You’ll be clipping in, moving between platforms, and following instructions, and you don’t want to juggle a phone the whole time.
Use lockers if they’re available, or keep essentials in a zippered pocket or a snug waist pack that won’t swing. If you’re bringing a phone for photos between rides, treat it like a “must be attached” item. Most parks don’t want phones held in your hand while you’re moving on the course.
9. Know What to Do on the Line
Once you launch, the goal is to stay calm and consistent. Your guides will show you where your hands belong, often on the trolley area or designated holds, and they’ll tell you exactly what not to touch. Follow that instruction every time, and don’t ever grab the cable.
A lot of first-time stability comes down to posture. Sit back into your harness like you’re sitting in a chair, keep your body centered, and avoid twisting to look around. If you’re told to wait for a clear line before you zip, actually wait. Those “little” rules are what keep the experience smooth for everyone.
10. Pay Attention to How You Land
Landing is where new riders get in their heads, so treat it like a simple sequence: listen, lift, and let the system do its job. Many courses will have you lift your legs as you come into the landing area so you don’t catch your feet early.
Braking varies by course. Some experiences use a self-braking setup, some use staff-assisted braking, and some may teach a gentle foot-brake technique. The only rule that never changes is to do exactly what your guide tells you to do on their particular course.
11. Remember That Nerves Are Normal and You Don’t Need to Rush
If you’re nervous, you’re normal. On a zipline, your brain is reacting to height and novelty, not danger. The fastest way to calm down is to slow your process down and focus on what you can control.
Use a simple routine. Take one deep breath before you step to the edge, keep your eyes forward, and repeat your first instruction in your head. Tell your guide you’re a little anxious, then let them pace you. Most people feel dramatically better after the first ride.
Ziplining FAQs
Can You Bring your Phone Ziplining?
You usually can bring your phone zipling, but it needs to be secured so your hands stay free and your phone stays attached.
Most parks don’t want riders holding a phone while riding. Use a zippered pocket, a secure pouch, or a belt bag that sits snug against your body. If your park offers lockers, that’s often the easiest option.
Where to Put Your Hands Ziplining?
Your hands should stay exactly where your guides instruct, typically on designated handles or straps near the trolley, not on the cable.
Hand placement rules can vary by course and braking system, so follow the briefing even if you’ve watched videos online. If you forget in the moment, ask your guide for a quick reminder before you launch.
How Can You Brake While Ziplining?
Braking depends on the course, as some systems are self-braking, and others use staff-assisted or friction-based braking.
The important part is to use the system the way your course teaches it, not the way a different course does it. If you aren’t sure what to do with your hands or how to position your body, ask before you clip in.
Can Ziplining Be Fun for Someone Afraid of Heights?
While ziplining might be initially challenging for someone who has a fear of heights, it can still be a fun activity. Many people end up feeling confident enough to zipline after going to the safety briefing, seeing how the harness works, and speaking with their guides.
What Should I Bring Ziplining?
Bring the basics for comfort, and keep everything else minimal so you can stay hands-free.
A good first-time checklist includes closed-toe shoes, comfortable clothing that works with a harness, sunscreen when the forecast calls for it, and water for before and after the ride. If you bring a phone, plan a secure storage option.
How Can I Avoid Harness Rub?
Comfortable, smooth layers help, and small fit adjustments before you launch usually solve most pinch points.
Harness straps can rub where fabric bunches or where skin is exposed. Longer shorts or lightweight pants often feel better under leg straps. If something feels pinched during fitting, speak up. Small adjustments at the start can make the whole tour more comfortable.
Does Ziplining Have Age, Height, or Weight Requirements?
Yes, most tours have requirements to keep the ride safe and to ensure the gear fits correctly.
Rules vary by park and by course, so always check the requirements for the experience you’re booking. If you’re booking for a group, confirm everyone’s eligibility before you arrive.
Ride the Longest Zipline in America at WildSide
If you’re looking for a zipline in Pigeon Forge, WildSide is ready to welcome you to your adventure park. At WildSide, you can soar across the Smoky Mountains while riding MegaZip, the longest zipline in North America. MegaZip is ideal for newcomers, as it features a self-braking system to ensure you’re always in control. We also start with a demo zip to ensure you’re fully prepared for the main course, and we have four side-by-side lines for people who want to go down in a group!
Learn more about MegaZip and book your ride today!